

You know when you go out shopping for a particular item, it never fails, you WILL NOT find what you're looking for. But, when you're just out browsing, it seems like you always stumble upon the perfect item that you just have to have, even if you have no use for it at the moment. Ladies, c'mon, I know you can relate to me here! Well, that's pretty much the way I ended up with this piece.
A couple weeks ago I was browsing through Craigslist looking for options for a custom piece I'm working on now. I was having no luck on that front, however every time I scrolled past this piece I did a double take. Finally, I clicked on it to find out more details. A vintage Drexel dresser for only $170? Intriguing. I know furniture well enough to know this is a deal. While this was far from what I was looking for, the wheels in my head started spinning. I was sure that I could find a place in our house for this piece. In fact, the more I thought about it, I decided this was the PERFECT piece for our house and we NEEDED it. So, I put the custom piece search on the back burner and snagged this piece for me.
Per the pictures posted online, it looked like I was going to be able to take the piece straight to the bedroom with no work required. As it turns out, pictures can be deceiving. The shiny white dresser actually turned out to be a stained yellowish dresser with dull, tarnished hardware. Fine, we can work with this.


After finding examples online of how I wanted the finished product to look, I decided lacquer was my best option for a paint choice. I'm a rookie with using lacquer, so before tackling this project I watched my fair share of Youtube videos and read as many 'how-to's' and blogs as possible. Bottom line, this was going to a labor intensive project and that whole 'imperfections add character' mentality that you can use with chalk paint doesn't really fly here. You want PERFECT.
Here's the rundown on how to achieve a smooth, shiny lacquer-finished piece of furniture:
1) Clean the piece thoroughly with soapy water
2) Give the piece a light sand with 320 grit sandpaper and wipe down any dust
3) Apply one coat of primer. Because I was going for a smooth and sleek finish I opted for the aerosol version. Kilz makes a great product that goes on evenly and dries quickly. Once the primer is dry, lightly sand again with 320 grit sandpaper.
4) Once the piece is primed, you're ready for the lacquer. Again, I went with the aerosol version by Rust-Oleum. The key to remember in this step is less is more. Apply thin layers that slightly overlap each other using a consistent movement back and forth. After each layer of lacquer, lightly sand the piece to remove any blotches or uneven areas. I ended up applying four layers of lacquer before I was able to achieve the bright white look I was going for.
5) Once you're satisfied with the coverage and have given the piece it's final sanding, it's time to give it some sheen. Use a Grade #0000 Super Fine steel wool pad to really smooth out the surface. Rub it in a circular motion while applying light pressure.
6) The final step is to protect the piece (and all that hard work you just put into it)! I applied a light coat of SC Johnson Paste Wax. This step helps to seal the underneath layers and to protect it from future wear and tear.
7) Finally, it's time to turn your attention to the hardware. Since I was really on a roll with aerosol cans, I decided to keep the trend going. I chose Rust-Oleum Metallic Gold Spray Paint.
Wow...that was a lot! Let me take a breath and then show off the finished product.

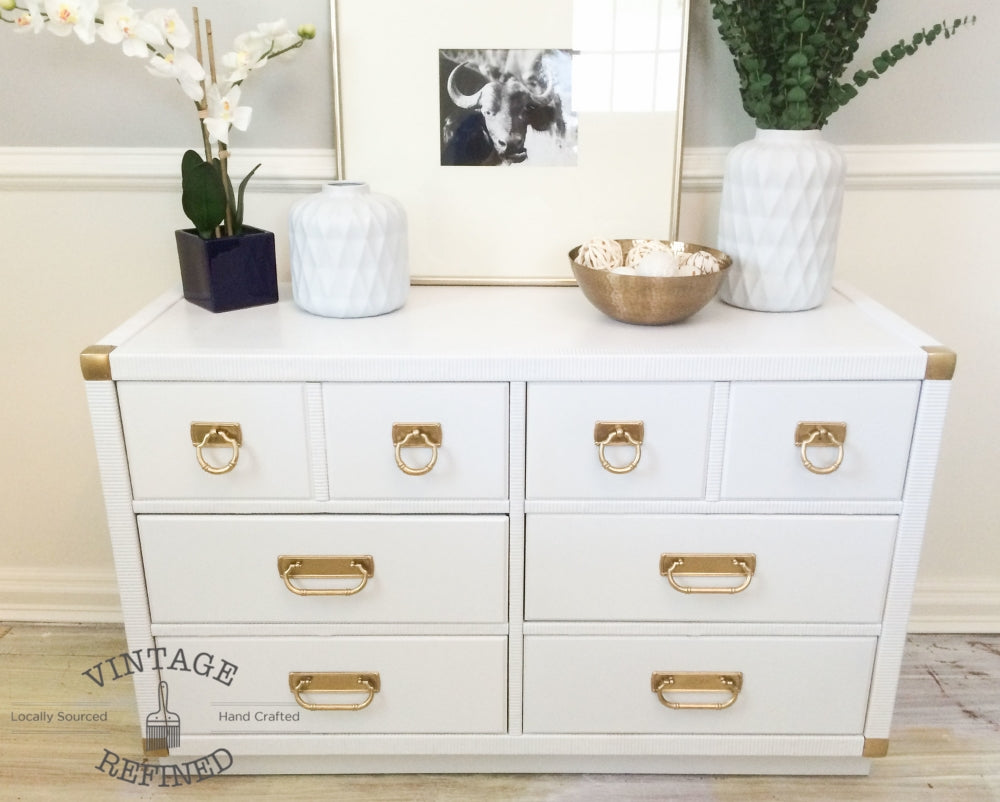
I love the crisp, clean look of the bright white.

The gold hardware really adds a great contrast as well.

It just has an overall chic feel to it.

Whenever I can salvage the original hardware, I try to keep it. I think it helps to maintain the integrity of the piece. This rule especially holds true on a dresser like this where the hardware is unique and helps to identify the style of the piece.

It's amazing how a couple coats of paint and some shiny hardware can really bring an old piece up to date.
