

Well Summer is finally in full swing over here which means I’ve been spending as much time as humanly possible at our place in Lake Geneva, WI. There is nothing better after a long week than to escape from the craziness of the city and relax in a peaceful environment and enjoy the outdoors. Although, up here, the days are long, and we cram A LOT into each day, so it’s never actually as peaceful as I envision. So I guess it’s still crazy, just a different kind of crazy! As I spend more time up there, my home projects list seems to shift and I focus more on lake house projects. Since these projects are on the forefront of my mind now, I went full force at tackling the nursery. I’m giving myself a pat on the back that I finished it just shy of Hannah’s two-year birthday. At what point does a child’s room shift from being called a nursery to a bedroom? Whatever that age is, I hope I haven’t passed it! Clearly, once winter comes and we quit spending time at the lake house, these projects drop off a cliff in terms of priority. So, it was now or never!

This room has been through several different makeovers already since our needs have shifted as our family has grown. You can check out the original makeover of this room here. Once Hannah came along, we knew we needed a proper nursery, and since this room is closest to the master bedroom, and pretty small in size, it seemed like the natural choice.

The nursery at our house is pretty girly (ok, really girly), you can check it out here, so I wanted to keep this one more casual and gender neutral. I also wanted it to have a lake house feel without being over-the-top nautical. So, given my love for blue & white, there was never really any other option I considered. So yes, in case you were wondering, blue & white is TOTALLY acceptable for a girl’s nursery!

Since this isn’t our primary home, I needed to keep this makeover on a tighter budget, which meant scouring my inventory for pieces to use and whipping up some good ole’ DIY projects.

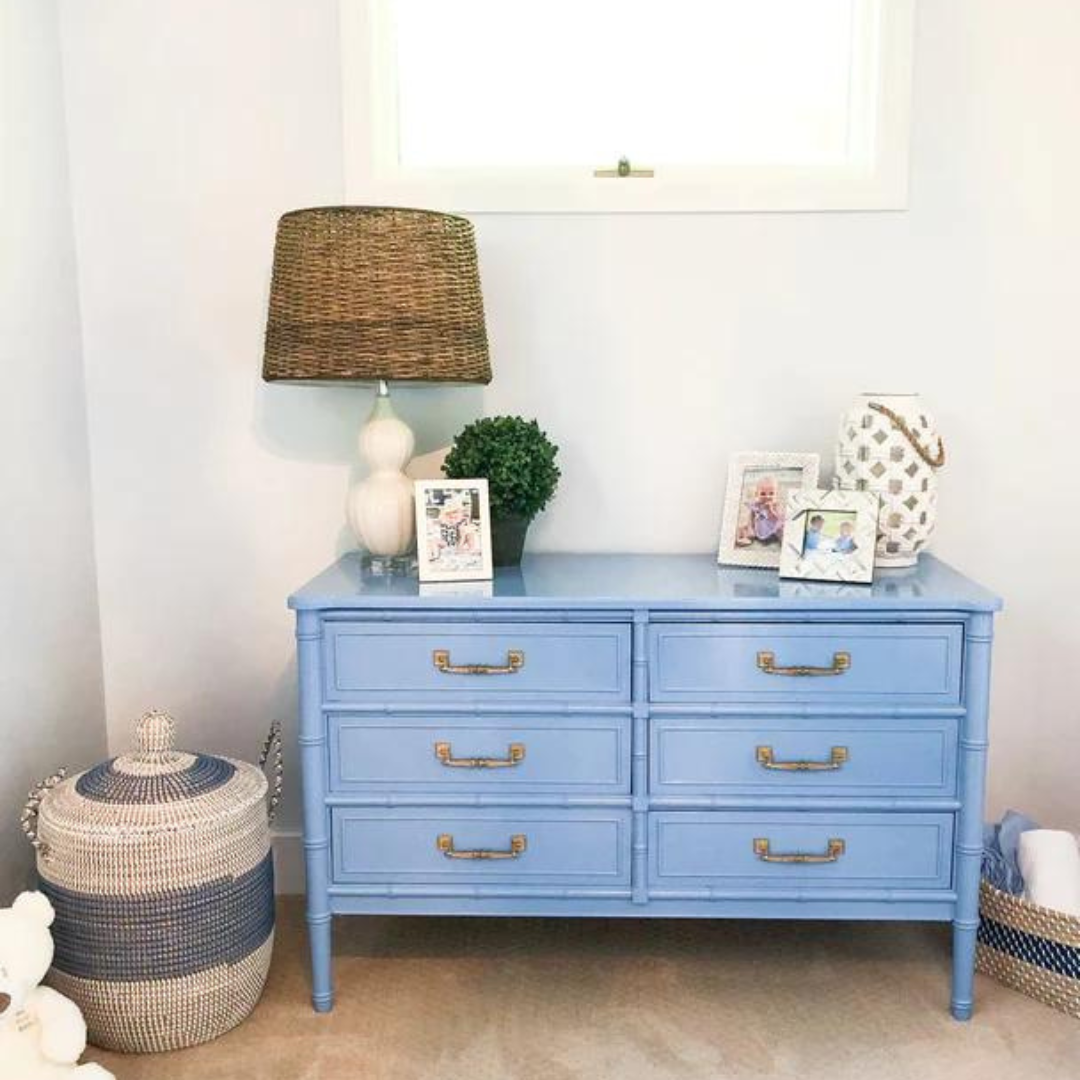
Before I even had a vision, I purchased some two-toned blue crib sheets from Serena & Lily. The colors in these sheets ended up being the inspiration for the room and set the tone in terms of what shades of blue I used. As much as I fought, wallpapering this room was a losing battle. So to spice up the room in a different (and cheaper) way, I opted to paint the ceiling blue. I color matched the lighter shade of blue from the sheet and used that for the ceiling and dresser. Guys, don’t think white is the only color you can use for ceilings! Think of your ceiling as a fifth wall and get creative! (I actually think I need to do a whole separate post on this, but that’s for another day!)


Once the ceiling was painted, the transition from the ceiling to the walls just looked harsh and unfinished. That’s where DIY project #1 came into play. You see that molding? That’s a Kyle & Ashley special! If I remember correctly, I was seven months pregnant while standing on a ladder painting that molding. Full disclosure…I don’t know if I remember correctly, because I’ve tried to block it out of my mind!

Once the walls and ceiling were painted (thanks mom & dad), and the molding was complete, the room started taking shape. The next step was furnishing the room. I scored a Bali Hai bamboo dresser awhile back that seamlessly made its way out of my inventory and into my home (that seems to happen frequently over here).

Another Vintage Refined piece we added to the room was the glider. It was a second hand glider from Room & Board that I found on Craigslist. Overall it was in great shape, just not my choice of color and the style was a bit too modern for me. I had my upholstery guy add piping in a contrasting color and a skirt around the bottom to help give it a more traditional look.

The next major piece of furniture was the crib. Once these three items were in place, it was time to accessorize. I opted for a clean, casual, coastal look by adding in rattan and coastal accents.

The final step was to take care of those tiny windows. We installed vinyl blinds to help block out the light. While they did work well in blocking light, they weren’t doing the room any favors when it came to style. To cover them up I built cornice boards, which also helped to add some flair to the walls.

Add in some hooks, throw pillows, and wall shelving, and call it a day! The room is cute, functional and can easily be updated as our needs change down the road.

And best of all, I finished it before her high school graduation!
