

So the seemingly never-ending project of finishing the guest bedroom continues. This week I finally finished creating a gallery wall. I have always loved the looks of gallery walls, but quite honestly, the thought of creating one myself has always intimidated me. Therefore, I've always stuck with the safe bet of 'pairs of two' or just one really large picture. Well, I decided it was time to face this challenge and take a stab at creating my own gallery wall.

While planning out the selection and layout, there were a couple guidelines I followed. I want to share these guidelines with you, as I think they help to make the task easier to manage and, at the end of the day, give you a personalized product.

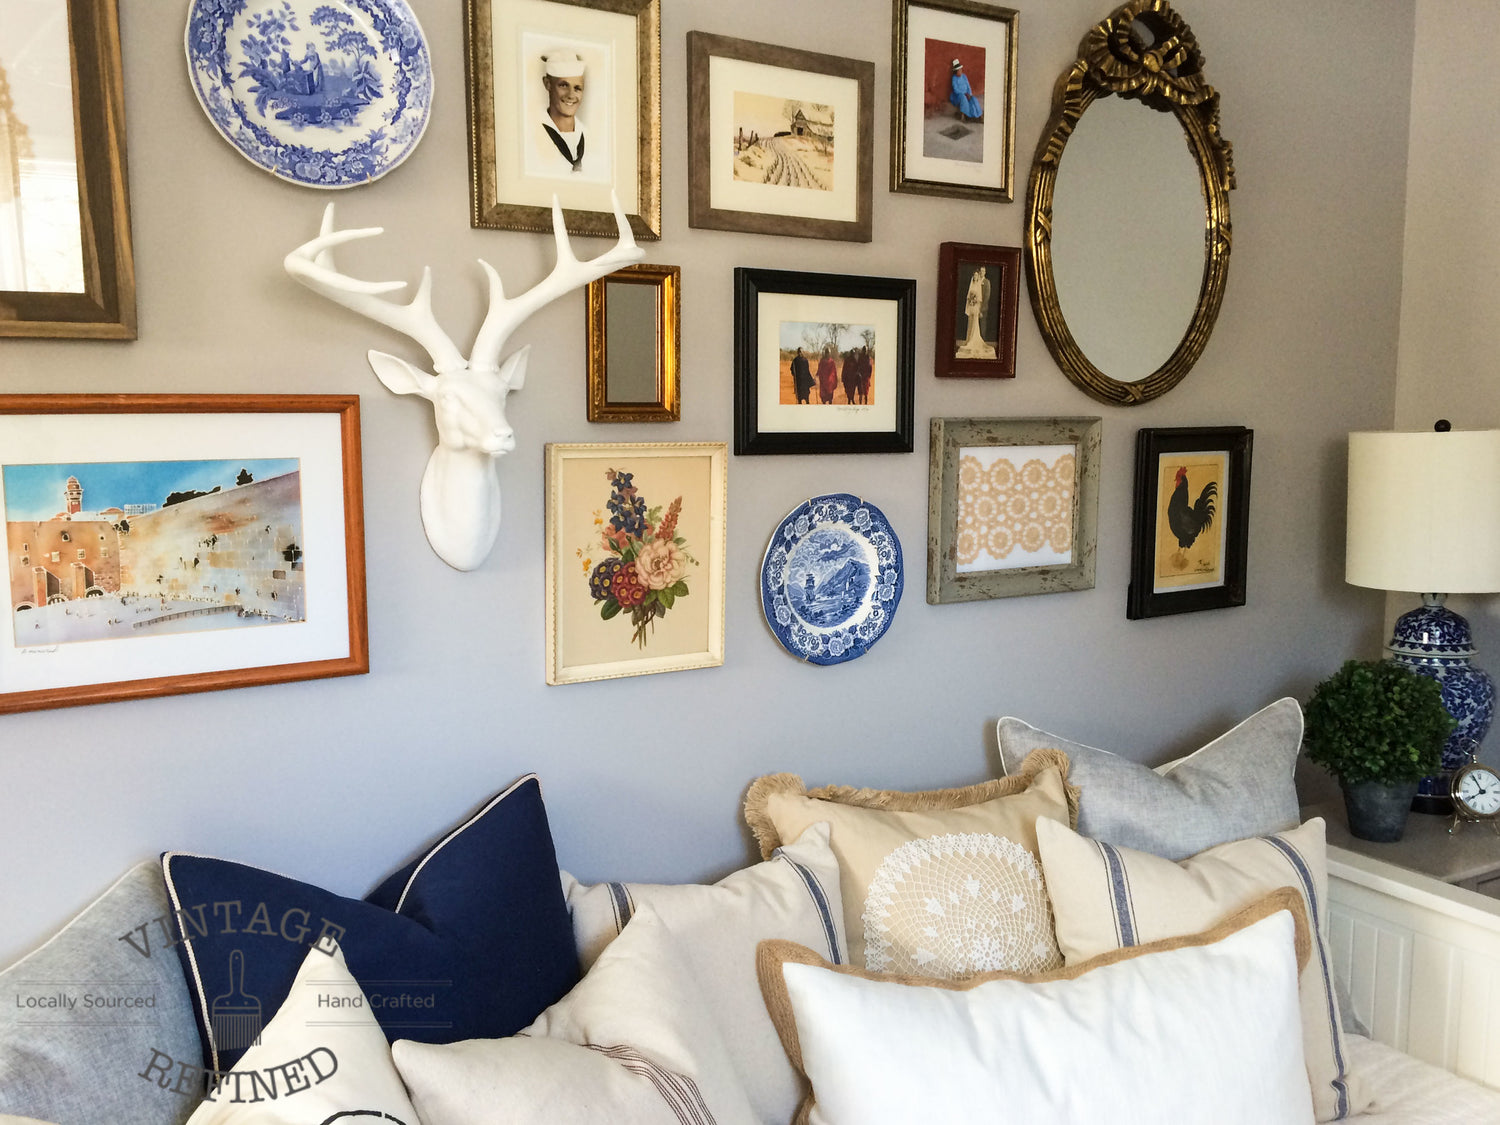
1) MAKE IT MEANINGFUL - What you hang on your walls is a reflection to others of who you are and what is important to you. It should ultimately tell a story and have some sort of special meaning to you. This wall depicts two important aspects of my life - family and travel.
For family, I chose to display old pictures of family members as well as some artwork that family members have created. In my mind, there is nothing cooler than old pictures and seeing people at a point in their life when you never knew them. It kind of takes you back in time.


In terms of travel, Kyle and I have been fortunate to have the opportunity to travel to some amazing places and immerse ourselves in different cultures. While I'm not big on displaying pictures of us posing in front of famous landmarks or historical places, I still want to remember these places we've been and the people we've met.


2) CHOOSE ITEMS FROM A LARGE RANGE OF TIME - Unless you are creating a gallery wall that showcases one major event, such as a wedding or the birth of a child, try to choose items from different points in your life. Again, this helps to tell a story, and prevents the wall from becoming dated. Otherwise people may see your wall and think, "Man, 2012 must have been a killer year for them...they just dedicated an entire wall to pictures from then."
I went to extremes with this rule. I displayed pictures of my grandparents from the 1940's all the way up to recent trips we've taken just a couple years ago.
3) THINK OUTSIDE THE BOX - the box in this reference being a picture frame. If there are other meaningful items you have, throw them up on the wall! While I'll admit, the deer head from Z Gallerie doesn't hold any personal meaning to me, it adds diversity. Bottom line, don't be afraid to include quotes, keys, clocks or whatever it is that reminds you of a special event in your life. (Picture below courtesy of lookiewhatidid.blogspot.com)

4) THINK BIG - A gallery wall can (and should) take up more space than what you would usually cover with just a couple pictures. Don't be concerned about the 'at eye level' rule. Also, feel free to continue to expand your wall as you come across different inspirational pieces. Here is an example that displays this rule to the max. (Picture below courtesy of slimpaley.com)

5) BREAK THE RULES - No one ever said your gallery wall has to be matchy-matchy. Make it eclectic. Let me backstep for a second...yes, you can make it uniform if you want. If you're going for a specific look of all black & white photos in black frames, you can do that. But if you want to combine black & white photos with color photos, and have a hodge-podge of frames, don't let anyone stop you.

I'm glad I finally found a way to display all these pictures I've had stored away in a closet. I love walking into this room now and being taken back in time to special events in my life.